Author

Andrews Mensah

Browsing

DIY: How to Build a Raised Garden Bed – Raised garden beds are some of the essential things that someone who is interested in gardening must-have. You might think that it requires sophisticated expertise to get it done, but we are here to let you know that it is something that you can do by yourself. This article will expose you to have to build a raised garden bed by yourself.

How deep does a raised bed need to be for a garden?

As someone who is looking forward to having a raised bed for his or her garden, you must know the required depth that the bed should be. It is worth noting that this dimension varies depending on the size of the raised bed you need for your garden. During our research, we discovered that the recommended depth of your raised bed should be around eight (8) inches and twelve (12) inches. We found the reason behind this to be that, at that depth, the roots of the plants have the required support that they need as depth gives the roots an ample growth environment. So having the depth between the stated range creates an environment where your plants can greatly flourish and reach their full potential.

What are the layers of a raised garden bed?

Most florists recommend a multi-layered method when building raised garden beds. The reason behind this recommendation is that the multi-layer method ensures that the plants grow well with the required optimal conditions. In the course of our research for this article, we gathered that the base of your bed, i.e. the foundation, should be made with gravel or small stones. This is because the gravel and small stones will facilitate efficient drainage and also prevent waterlogging in the bed. The prime effect of this is that it provides the adequate conditions necessary for the growth of the roots.

After the gravel or small stone, add nutrient-rich garden soil mixed with organic matter. As widely known, organic matter will provide the needed nutrients required for the plant to thrive well. In order to ensure the improvement of the soil’s fertility, just add a layer of manure or compost. This layer comes just after the organic matter-soil combination layer. For the top of the bed which happens to be the final layer, add high-quality topsoil.

What is the best soil for raised beds?

By now you might be wondering about what is actually the best soil for raised beds. In our research, we found out that topsoil serves as a cornerstone of any raised bed. This is because it offers essential characteristics needed for optimal plant growth. Usually, top soils are supposed to be dark as well as crumbly in texture as this means that the soil is genuinely rich in organic matter and nutrients.

How to Build a Raised Garden Bed

Building a raised garden bed requires some steps and these steps are;

  1. Choosing the Right Location: You just can’t stand up and put your raised bed anywhere in your garden. You might have a vast land that serves as a garden, however, you should keep in mind that it is not every side that can be conducive for your raised garden bed. One of the things that you must look out for is whether the location that you choose has adequate sunlight because light is necessary for plant growth. Additionally, you must see to it that the area you choose to build your raised garden bed should have access to water.
  2. Selecting Materials and Tools: You can’t start building a raised garden bed without the right tools. Right after you spot the suitable location for your raised garden bed, proceed to look for the needed materials. To successfully build your raised garden bed, you will need wood (such as cedar or redwood), and if wood is not available, you can try alternative products like galvanized steel or composite materials. Other essential tools include a saw, drill, level, measuring tape, and gloves for safety will be needed.
  3. Designing Your Raised Garden Bed: With materials and tools in hand, it is now left to come up with the right design. Designing your raised garden bed requires determining its dimensions and this will be based on the available space at your disposal as well as your personal preference.
  4. Preparing the Site: Once your design is ready, proceed to prepare the site that you settled on by clearing it. It will be prudent to know that if the area is prone to weeds, laying down a weed barrier fabric can help curb their invasion.
  5. Assembling and Filling Your Garden Bed: As you have cleared and optimized your site to your satisfaction, proceed to assemble your raised garden bed according to the design that you chose. Once these parts are assembled, fill the bed with the various layered content that will give you the optimized soil conditions.
  6. Planting and Maintaining Your Raised Garden Bed: With your raised garden bed primed for planting, proceed to plant your plants. Keep in mind that once you plant, you must try your best to maintain the bed in order for the plants to have the required conditions.

Source: www.ghgossip.com

Most Common Air Conditioner Repairs That You Can Do Yourself – Most air conditioner repairers will never let you know that there are some fixes that you can do on your own without involving a technician.

These fixes can be carried on several air conditioning problems and get it fixed, and in this article, we will be taking a look at some of the things that you can do to fix your AC on your own.

Experiencing air filter problem

As someone who uses an air conditioner regularly, you will one day be faced with issues concerning your air conditioner’s air filter. These filters are designed to make your experience with air conditioners a memorable one, however, they can become defective. When this happens, you might think about calling a repairer or sending it to a repairer. What if I told you that you can fix this yourself? Yes, you can, and all you need to do to find where your air conditioner’s air filter is located. Once you see this, proceed to remove the defective one while you have a new one in place. Immediately put the new one in the air conditioner and ‘viola’, you can now enjoy your ‘cooling’ experience without any stress. It is worth noting that before you go ahead to change your air filter, you must make sure that it is damaged and cannot be salvaged in any way. The reason behind this recommendation is that sometimes the filters are not damaged, but rather they are dirty which needs just some form of cleaning.

Experiencing leakage

Leaks can make you have some of the worst experiences as an air conditioner user. Your air conditioner will be switched on, however, its soothing effects will not be felt and this can be because there is a leakage one way or the other. One thing that you must do is to keep a keen eye out for indicators of refrigerant leaks. To identify this, look out for subtle hissing sounds near the AC unit to conspicuous ice accumulation along the refrigerant lines. Although you can try and fix this by yourself, the process is not all that straightforward, so if in any way you feel like it is becoming quite cumbersome, kindly chill and contact a technician to fix it for you.

Experiencing problems with your air conditioner’s fan

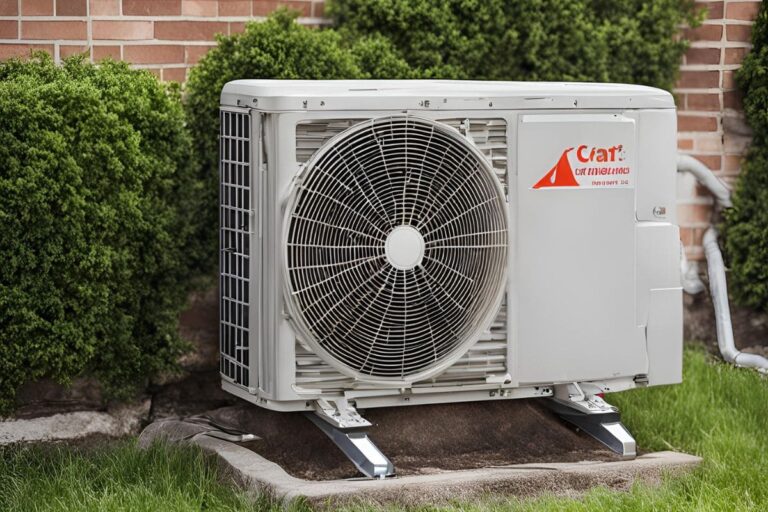
Aside from the above mentioned problems associated with air conditioners, one other peculiar problem with ACs is fan problems. These fans can be found in the outdoor section of the AC and it helps in drawing warm air from rooms. If this fan gets damaged, just imagine what will happen. To try and fix problems associated with your air conditioner’s fan, you must first identify what the actual problem is. It might be that the fan is just dirty or some of the blades are bent in a way that makes the fan function ineffectively. This can be said to be a minor problem and can be fixed by cleaning or replacing the fan. A major problem that can be faced with regard to an air conditioner’s fan is a damaged fan motor and with this, we would recommend that you contact a technician.

Experience electrical fault with your air conditioner

In fact, the first troubleshooting step is to check if everything is stable electrically because there are times that you might think your air conditioner’s problem is a big problem, however, it would just be inadequate electric supply – light out, low current, or faulty switch. It is also advisable to check the wiring for some damage and because wiring is quite delicate, it is advisable to contact a technician if you spot an issue with the wiring.

Experiencing issues with your thermostat

Thermostats are designed in a way that they use temperature to operate, any weird fluctuation in temperature, your air conditioner will not function effectively. In order to see if the problem with your AC is due to an issue with your thermostat, check the temperature and compare it to the standard thermostat required. If you feel your thermostat is the issue and is damaged beyond repairs, just replace it and be free from hassle.

Source: www.ghgossip.com

DIY: Easily Eliminate Sugar Ants In Your Home – Simply put, dealing with sugar ants can be quite irritating due to the fact that they usually move in large numbers. In this article, we will be taking a look at how to easily eliminate sugar ants permanently in your home.

Does salt kill sugar ants?

There are people who might probably have an idea about using salt to eliminate sugar ants in their homes. Well, this section of the article will address questions surrounding whether as an individual you can use salt to kill sugar ants with the end product being that you eliminate them from your home. You must have it at the back of your mind that a simple yet effective method for repelling ants involves creating a barrier using a line of salt.

By doing this, you are disrupting the sensory perceptions of sugar ants, and ants in general, and this is due to the presence of sodium chloride. Our checks revealed that when this happens, these sugar ants are deterred from crossing the line, invading your home, and causing havoc. We also found out that a spray solution of salt water can serve as a potent weapon against sugar ants. This works in a way that when the spray is applied to these ants, the salt water causes dehydration to these sugar ants and causes them to die.

What kills sugar ants the best?

As someone who is ‘having a battle’ with sugar ants in your home, you must be wondering what to do to kill sugar ants and even with that what actually kills these sugar ants best. One ingredient that we discovered during our research that best kills sugar ants was white vinegar.

In order to make the white vinegar effective in killing sugar ants, you must mix it in a mixture. You also choose to use only the white vinegar. Upon deciding what to do, just go ahead and spray the solution strategically around your home with the target areas being areas where these sugar ants are mostly seen. You must keep in mind that the white vinegar solution that you make does not only eradicate existing sugar ants seen at the time of the spraying activity but also acts as a deterrent, discouraging future sugar ant invasions. You might be wondering what actually makes the white vinegar effective against sugar ants. The white vinegar is known to contain acetic acid and this is known to cause a disruption in the sensory pathways of sugar ants. When these sensory pathways are disrupted, there are problems in the navigation and communication system of these ants.

How do I get rid of sugar ants permanently?

There are some people – especially advertisers who might put it out there that only experts can permanently get rid of sugar ants. However, this notion is not entirely true as there are some natural and man-made products that can be used to effectively combat the invasion of sugar ants in your home. These products have proven to be quite effective against sugar ants so if you are looking forward to combating sugar ant invasion in your home, you must try these products out, and don’t forget to share your experiences in the comments sections of this article.

What scent keeps sugar ants away?

There are some scents that naturally keep sugar ants away from home. It is safe to say that sugar ants are practically ‘allergic’ to these scents. Our checks when we were studying sugar ants and their ways revealed that sugar ants are allergic to the scents from vinegar, lemon juice, and well as peppermint oil. These products have chemicals and substances that are harmful to these sugar ants so in order to protect themselves, they will shy away when they sense these scents. Imagine all homes having one of these products, then it means that the invasion of sugar ants in homes will be a thing of the past.

Do Sugar Ants Inflict Bites?

If you have sugar ants invading your home, it is possible to be concerned about one thing – whether these ants inflict bites. You know ant bites are not very pleasant, however, generally, sugar ants do not inflict bites. Thinking about this, we delve into the behaviors of sugar ants and we discovered that sugar ants have their focus revolving around foraging for sweet substances and maintaining their colonies rather than engaging in aggressive behavior towards humans which includes inflicting bites. Although it has been established that sugar ants do not inflict bites, we would urge you to have some form of vigilance when dealing with sugar ants because who knows you will be the first to have a bite from sugar ants.

Source: www.ghgossip.com

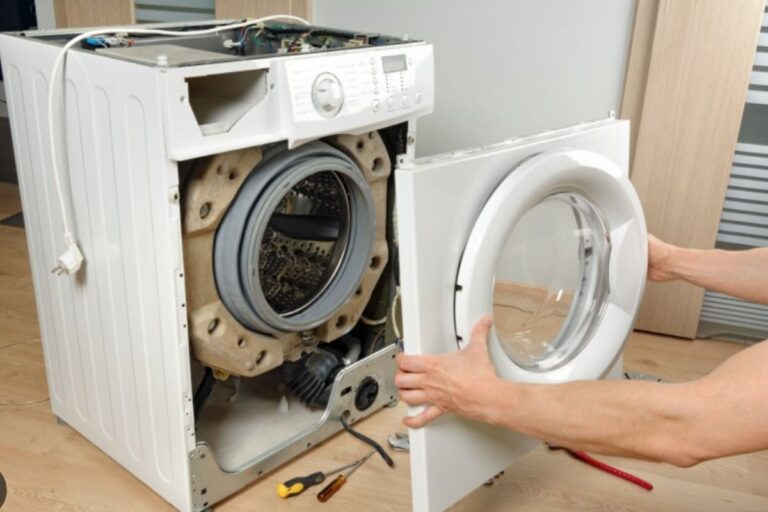
Simple Steps To Repair A Washing Machine (By Yourself) – One of the things that as an individual you must know how to do is service your washing machine. At first glance, you might think that servicing your washing machine can be tedious, however, we must assure you that it is not as cumbersome as it might seem.

The mind-blowing thing is that most of your washing machine problems (over 80% of such problems) can be fixed with some simple steps that you had no idea about.

We would also urge you not to worry if you lack prior experience in appliance repair, as the list that we will be sharing contains straightforward steps and these steps are accessible to anyone. By investing a little time, gathering the necessary tools, and following clear instructions, you’ll not only save money but also gain the satisfaction of fixing your washer yourself.

Trying to fix your washing machine by yourself will not only save you the time and hassle of sending your damaged or faulty appliance to the washing machine repairer but also save you significant money as you will be spending 10s of dollars compared to spending 100s of dollars when you take it to the repair shop.

Check out the steps involved in repairing your washing machine below and you must know that you must have some tools before you begin. The tools that you need include screwdrivers, a flashlight to aid you see through the dark spaces in the washing machine, a nut driver, different sizes of pliers, and a socket or rachet.

Check for Electrical Fault

Well, as an appliance that mostly relies on electricity, the first troubleshooting that you must do is to check whether the appliance is receiving the needed power supply. The reason why you must first check whether there is an electric fault is the fact that some of the faults may be caused by an inadequate power supply to the system. When this happens, the appliance might refuse to operate and this can make you think that it is a major fault that requires sophisticated expertise. Imagine carrying your 50-kilogram washing machine to a washing machine repair shop only to be told that the fault is just an electrical fault that was fixed within five minutes. This electric fault fixed might even cost less than $20.

Check if the grinding noise has issues

Another quick fix that you can make is to check if there is a grinding noise associated with your faulty washing machine. There can be a grinding noise if your coupler is broken and if your coupler is still intact, you are good to go. Most washing machine problems associated with grinding noise can be fixed by just changing the broken coupler of your washing machine. Once you check and it is damaged, don’t panic as this can be fixed by yourself. If it is damaged, just get a new one and the price, according to our checks, is less than $30.

Washing machine encountering drainage problems

Modern washing machines are mostly faced with problems concerning their drainage. Truth be told, if you encounter such an issue, the first thought will be to send the washing to a repairer for a fix, but I can assure you that you will be able to fix this at home without the need to involve any repairer. What will make you see you have a drainage problem is that water that is supposed to drain will not do so, and also you will have some unfamiliar sounds from your washing machine. To do this, just get your tools and disconnect the tubes. Be sure to have a bowl beside you so you can drain the water into it. Once the water is drained, check the parts, especially the blades to see if they are broken. Additionally, check if the shafts that are located in the pumps rotate freely. Once you see any unusual thing, proceed to check a new part and fix it where it got damaged and you are good to go.

Your washing machine experiencing slow fill or no fill

Slow fill or no fill has to do with water not filling your washing machine in order to use it for the intended purposes. One thing that you must know about such an issue is that it is associated with the water valve which can be choked when not cleaned for a while. When you encounter such an issue with your washing machine, just go ahead and check these valves to see whether they are choked or not. If it happens that they are choked, all that you have to do is to clean these valves. There can be a point where even after cleaning, the issue will still persist try changing these valves which costs not more than $50.

Source: ww.ghgossip.com