Author

Andrews Mensah

Browsing

DIY: How to Make a Home Security System on a Budget – Everyone is required to have some form of security, irrespective of their budget. In this article, we will be taking a look at how you can make a security system on a budget.

Which home security is the cheapest?

As someone who is looking to set up a home security, one thing that you must consider is cost. With this in mind, you might probably be thinking about some of the cheapest options for home security.

To be very honest, it’s essential to identify the most affordable systems available, and during my research for this article, I found several home security systems that stood out for their cost-effectiveness and functionality.

Some of the agencies providing the cheapest home security systems are SimpliSafe, Cove Security Abode, Frontpoint, and Brinks.

What I would urge you to keep in mind is that each offer unique benefits, catering to various needs and preferences while keeping costs manageable.

Which DIY home security system is best?

There are a lot of DIY home security systems around, and some of these can be considered the best. Such home security systems ensure that there is an option for every need and preference.

In my research, the best overall DIY home security system is the ring alarm. The ting alarm is widely known for its comprehensive features and reliability and also provides a robust and user-friendly experience.

Additionally, SimpliSafe also has some of the best systems as its systems are designed to be incredibly straightforward to set up. In fact, this makes it accessible even for those with minimal technical expertise.

In all these, what you must keep in mind is that each of these DIY home security systems excels in different areas. It actually ensures that there is a suitable option for a variety of needs and budgets so you have to choose based on your needs and budgets.

How can I protect my house without a security system?

Irrespective of the fact that building a home security system is appropriate, you can actually use ways to protect your house without a security system.

You can install motion detector lights around your property as these lights can deter potential intruders. Anytime there is a movement in dark areas where they are installed, these lights will come on and this gives the impression that there is someone at home so any intruder should beware.

Additionally, you can leave a few lights on, that is both inside and outside, as this can also help. Keeping lights on makes it appear as though the house is occupied, which can discourage would-be burglars. However, while doing this you must definitely be concerned about your electricity bills.

To ensure that you protect your homes without installing a home security system, try and always ensure that all doors and windows are locked.

One way that you can protect your home against intrusion without any home security system is by keeping valuables out of sight.

By implementing these practical measures as someone who is security conscious, you can significantly enhance the security of your home without the need for a home security system.

How can I make my own home security?

Anyone can create his or her own home security system and this can be said to be a manageable and effective project.

The first thing that you must do when you want to make your own home security is to decide how much security you really need. Make an assessing of your home’s layout, as well as the crime rate in your area. In effect, this will help you determine the type and extent of security measures necessary.

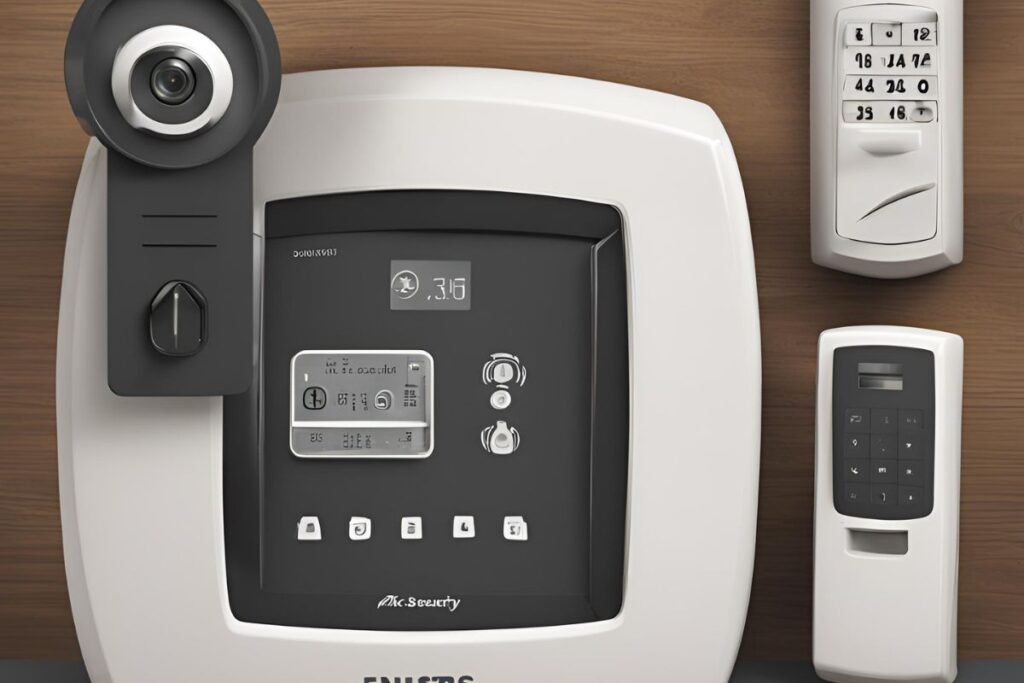
Proceed to think strategically about the placement of some control panels that will aid in your security ensuring that they are easily accessible to you but not to intruders.

In the event that you decide to choose a security system, it is recommended that you choose a wireless one whenever possible. It has been established that wireless systems are generally easier to install and also they are known to be more flexible and scalable than wired systems.

These are a few ways that you can use to make your own security system at home and I would suggest that you must be thoughtful in planning and strategically implementing these components.

How much does it cost to build a home security system?

Thinking about how much it costs to build a home security system is a prudent thought, and in this section of the article, you will have a fair idea of how much you must cough out in terms of money in order to build a home security system.

In reality, building a home security system typically costs around $600, but basic DIY packages can start at $200. This cost involves professional installation fees that can be between $100 to $400. Additionally, there might also be activation fees that can go up to about $200.

Source: www.ghgossip.com

DIY: Making Your Own Natural Perfume at Home (Simple Guide) – This article has all the tips that you need when making your own natural perfume at home. Not many people are convinced enough that they can make natural perfumes at home, however, after reading this article, I am very sure that you will have a change of mind regarding making your own natural perfumes at home.

How to make natural perfume at home?

With the increase in prices of perfumes, you might be thinking about some alternatives that will make you smell good in the midst of others while on a tight budget. Well, what if I told you that you can make your own perfume at home all by yourself without any expert ideas? I guess you have probably dropped your jaw, right.

Yes, you can actually make natural perfumes at home and this can be done in some simple steps that will take no more than an hour of your time. During my research for the article, I found an educative video that elaborated on how to make good-scented natural perfumes and I would like to share this lovely video with you. Check the video out below;

What are the ingredients in natural fragrances?

One of the materials needed to make natural perfumes is natural fragrances. As inquisitive as humans are, many would be wondering what are the ingredients that make a natural fragrance. Natural fragrances are usually made from a variety of ingredients that are natural as the name implies. These ingredients include trees, fruits, animal extracts, herbs, leaves, seeds, roots, and various types of wood.

After they have been obtained, they are processed into essential oils, botanical extracts, isolates, resins, distillates, and volatile concentrates. The resulting products mostly create complex and appealing scents. Again, one thing that you must keep in mind is that the use of these pure, high-quality substances often makes natural fragrances more expensive compared to synthetic ones. So if you had a question about the ingredients that are used to make natural fragrances, I guess the above has answered your question.

How do I create my own perfume?

At this point, you might probably be thinking about how to create your own perfume. The first thing that I would like to mention is that you can create your own perfume in simple and easy steps. The starting point of creating your own perfume is by adding drops of essential oils in a small bowl. Before doing this, you must select these oils and this is intended to create your desired scent.

The next thing that you have to do is add some alcohol to the essential oils you have dropped in the bowl and pour the resulting mixture into a glass bottle. Proceed to seal the bottle tightly and shake it well to ensure the ingredients mix completely leaving no trace of the contents. It is recommended to store the bottle containing the mixture in a cool place as this will preserve the fragrance. The above simple steps are how to make your own perfume.

How to make herbs into perfume?

There is another way to make perfume and this is by using herbs. You will be amazed by the results after turning herbs into perfume and to do this, you must first fill a glass jar with your chosen herbs and it is recommended to add some essential oil. The next step in this process is to seal the jar and place it in the sun.

The content must be placed in the sun for several weeks and this is to allow the scent to infuse into the oil. Heat the infused oil gently and add some beeswax. The beeswax is added to create a solid perfume. After this stage, you can start using your perfume.

Can cloves make perfume?

Cloves are widely known worldwide to have some blending capabilities, especially when combined with essential oils. This is actually the main reason why it is used to make perfumes. Another attribute of cloves that makes them perfect for making perfumes is the fact that they complement floral notes and enhance their richness.

Which herb is used as perfume?

The widely known herb that is used to make perfume is Lavender. The herb has been used for perfumes for centuries and what makes it a perfect herb for perfume is its soothing and pleasant aroma.

What spices are best for perfume?

Other ingredients that are used to make perfumes are cinnamon, saffron, chili pepper, ginger, coriander and cardamom. These spices can be classified into two groups – cold spices and warm spices.

Source: www.ghgossip.com

How to Make Easy DIY Hairstyles for Different Occasions – Imagine being able to do different hairstyles for different occasions by yourself. Well, this article is aimed at equipping you with the necessary expertise to achieve this.

How to do simple hairstyles by yourself?

As a lady, there are times that you might want to fix your hair at home for a function without involving any hairdresser. Well, there are several ways to go by this, as we were researching for this article, we found a nice video that showcased how to expertly do simple hairstyles by yourself, and the amazing this is that these hairstyles look greatly appetizing and you can rock them to any function that you want. Check out the 60-minute video below;

What is the easiest hairstyle to learn?

There are some hairstyles that are easy to learn and you can rock them anytime for any occasion or function. If you’re always running late and need a quick and easy hairstyle, you can try out these options. These simple and easy hairstyles that you can learn and apply include the half-up braid, the half-up topknot, the scarf bun, the easy half-up style, the easy perky ponytail, the clipped side braid or the inside-out ponytail, and the baby clips. All the mentioned hairstyles are a simple yet charming way to manage your hair effortlessly. So, if you need to fix your hair hurriedly, you can try them out.

How can I style my hair naturally at home?

As someone who prefers to have natural hair, there are ways that you can style your hair by yourself while maintaining your natural looks. One of the best ways to style your hair at home by yourself while maintaining your natural look is by flat twisting your hair back and adding some adorable knots at the ends.

In order to do this, wash your hair with the necessary conditioners. It is recommended that you do this in the evening as you will have to let your hair dry overnight. When you notice that your hair is dried completely, proceed to gently unravel the twists. We gathered that to achieve the best results, you can use a styling cream and styling oil before you start. You can as well finish with a styling oil spray and this is aimed at adding shine and let your hair have a polished finish. Interested in this, you can try it out and leave a comment in our comments section about how it went down.

How do I find the best hairstyle for myself?

As a person, you must find the best hairstyle that works for you. To do this, you will have to try out several hairstyles and then you decide. Additionally, aside from trying several hairstyles out before you decide, you have to consider several factors. These factors include face shape, hair type, lifestyle, and personal style.

You must start by determining your face shape and this is to identify the most flattering cuts. To do this, you must consult with a professional hairstylist who can easily provide valuable insights and recommendations. We mentioned lifestyle as one of the factors. Well, the reason behind this is that your lifestyle will determine how much time you want to spend on maintenance and styling each day. For instance, as a simple person, you might prefer trimming your hair to always tying your hair while having long hair.

How to Make Easy DIY Hairstyles for Different Occasions

To make easy DIY hairstyles, you must first determine the occasion. For instance, for every casual occasion, a quick and easy ponytail can be your best friend. There are several ways to make the ponytail catchy, and in order to do this, you can try adding a twist by wrapping a section of hair around the hair tie.

When it comes to professional settings, you might opt for polished and neat hairstyles. Having a sleek low bun that exudes sophistication is quite ideal for professional occasions. This can be done by parting your hair in the middle, smoothing it back, and securing it at the nape of your neck. You can also use polished ponytails for professional occasions.

You can have soft waves and curls for your dates as well as romantic nights. Although, we have suggested some DIY tailored for specific occasions, but don’t be afraid to try new looks and adapt them to suit your personal style and the occasion.

Source: www.ghgossip.com

How to Decorate Your Home with DIY Wall Art – As people with creative ideas, there are times that we might want to implement some ideas that we might have in our head. One of such moment is implementing a soothing wall decor.

Most homes have their walls decorated with paints, but what if you want a different touch and this is when the concept of wall art comes into play. The word, Wall Art, might create the impression that you need an expert to carry it out. However, that is not the case as you can actually decorate your home with a wall art done by yourself.

Don’t worry about how to go by this as this article will equip you with the needed expertise and ideas to create your own unique design when it comes to creating wall art that you can use on your walls to have a lasting positive effect on you and anyone who chances on it. To explore more in this regard, we would urge you to read this article to the very end.

How can I make my walls look better without paint?

Gradually, paints are becoming somewhat old-fashioned. Many people are looking for ways to make their walls look extremely glamorous without the use of paint. Due to this, many people are mostly bothered with the question, How can they make their walls better without paint? Some nice ideas that we chanced upon during our research for this article are using temporary wallpapers, DIY wall designs using masking tape, hanging art or photos, tile transfers, installing shelves, and bamboo blinds. These alternatives can transform your walls without having to use paints.

How can I decorate my walls for cheap?

You might be living on a tight budget but still would want to have a nice looking wall. Well, there are several ways that you can achieve this. Decorating your walls on a budget can be both easy and stylish as this is widely made possible using some adorable DIY ideas. One notable thing that you can use to decorate your wall is by using hanging plates and platters which is a simple and cost-effective way to fill large blank spaces. You can also add a mirror and this can create the illusion of more space and light. Additionally, using a gallery wall featuring your favorite photos or art gives a personalized touch. Other DIY ideas are framing pages from a book, monogram art, peg shelves, book ledges, and framing heirlooms.

How can I decorate my wall?

Decorating your walls can transform your home into a beautiful and personalized space, and there are several ways to go about this. You can consider creating an accent wall. Also, there are some who prefer to use wall decals as they offer an easy way to introduce patterns and designs. Hanging wall art can be used as it can bring color and interest. You can decorate your wall with a photo gallery as it showcases cherished memories. One other way to decorate your wall is to use empty frames as these can be arranged creatively for a unique display. You can also decorate your wall using wall lights. Mirrors can also be used to decorate your wall and this can make your room feel larger and more elegant. Displaying greeting cards as a form of wall decor adds a charming and personal touch to your wall decor.

How to Decorate Your Home with DIY Wall Art

The first step in decorating with DIY wall art is choosing pieces. Make sure that the pieces that you choose complement your space. What you can consider while choosing these appropriate pieces are the room’s existing color scheme, furniture, and overall theme.

After choosing the pieces, go ahead and gather all the necessary materials and tools that you will need. Some of the materials and tools that you will need include canvases, paint, brushes, markers, glue, scissors, and frames. Proceed to choose some ideas – these DIY wall decor ideas can be found online.

After settling on the design that you want, proceed with preparing your workspace, sketching your design, adding some painting techniques, adding texture and depth, framing, and finishing touches.

Source: www.ghgossip.com

How to Make Homemade Candles – One of the best things that you can bless your home with is sweet-scented homemade candles. As we mentioned candles, you might probably be thinking if indeed candles can be made at home. Well, you can make candles at home, YES you!!!

This article is carefully curated for anyone who wants to know more in this regard, and it contains all the juicy details you will need to make homemade candles.

How do I make my own candles at home?

Before you delve into how you can make your own candles at home, you might probably be thinking that maybe the process is a difficult and tedious one, however, the reality is that it is not. Well, we must also say that making your own candles at home is actually something that is straightforward and you might even enjoy the process.

Your starting point if you want to make candles at home is to prepare your container. By doing this, you must ensure it is clean and dry. Go ahead and melt the wax, and in order to be sure that the wax is fully melted, you must stir continuously. Once melted, remove from heat, let it cool slightly, and add fragrance oil. While doing this, you must stir thoroughly. Attach the wick to the bottom of your container, keeping it centered. At this point, all you need to do is to carefully pour the wax into the container, holding the wick steady. Allow the candle to set completely, then trim the wick to an appreciable size.

What ingredients are used to make candles?

There are several ingredients suitable for making candles. Worldwide, what most people are using to make candles is paraffin. The reason behind this choice is that paraffin is known to be quite affordable, and also, it has versatility in its usage. Aside from paraffin, other wax products that can be used to make candles are soy wax, beeswax, and palm wax.

How to make strong smelling candles?

In order to make strong smelling candles, there is only one thing that you need to do. Just increase the amount of fragrance oil you add to your melted wax. This analogy is a simple one so the more fragrance oil you use, the more aromatic the candle will be. To some extent, the type of wax you choose also affects the scent as some waxes hold and release fragrance better than others. We discovered that when making candles, it is recommended to use one ounce of fragrance oil per pound of wax, but this can be adjusted based on the desired intensity of the scent, and it all boils down to personal preference.

Are homemade candles cheap to make?

If you are wondering if homemade candles are cheap to make is a good thought. Well, we consider it as a good thought because before you start doing anything, it is safe to know the amount that you must put in to make it a success. To make homemade candles, know that homemade candles can be cost-effective. Our checks revealed that with around $20 you can make some nice scented candles for your home.

How do you make 100% natural candles?

Making 100% natural candles is possible and what you need to do is to melt any wax flakes of your choice. Keep in mind that there are some waxes that are synthetic so you must go in for the natural one – a typical example is Soy Wax. As you are melting the wax, you can multitask as you can start preparing your candle jars. Once the wax is fully melted, add a natural candle dye block and your choice of natural fragrance oil, stirring thoroughly to blend the ingredients.

The next thing to do is to pour the melted wax mixture into the prepared candle jars, holding the wick steady to keep it centered. It is now time to allow the wax in the candle jar to cool and also solidify. After this process, you can use your 100% homemade candles.

What type of wax is best for candles?

The best type of wax, according to our research, is paraffin wax. This is because paraffin wax is known to be affordable as well as versatile. Research has also revealed that paraffin wax also gives out a strong fragrance.

Source: www.ghgossip.com

DIY: How to Build Your Own Solar-Powered Phone Charger – Aside from using normal electricity to charge your phones, you can also use solar-powered phone chargers.

At first glance, you might think that there is no way you can actually make these panels by yourself in your home, however, that is not the case. There are ways that you can do these solar panels that are suitable for charging phones by yourself in your home.

This article will expose you to how you can effectively do this without any stress including the materials needed to make these panels.

What materials are needed for solar-powered phone chargers?

Before you can be able to make a solar-powered phone charger, you must first have the right items to carry out this action. You’ll need several key materials, and these materials include three solar panels rated at 5.5 volts and 245 milliamps each. Additionally, you will need a boost converter module which usually has a voltage of five volts. Without a switch, there is no way you can proceed, and this means that you will need a switch. What the switch does is that it controls the power flow. One important thing that you will need is a masking tape which will provide some form of insulation. Other materials needed are wires for connections and a soldering kit for joining components together.

Can I charge my phone directly from a solar panel?

It is possible to charge your phone directly from a solar panel. Just go ahead and connect your phone to a solar panel. By doing this, you make use of renewable energy by virtue of natural sunlight, and the amazing thing is that you don’t have to pay electricity bills for charging your phone with a solar panel, and also you don’t have to fear lights out.

How many watts is a solar charger?

Most residential solar panels are known to commonly range from 250 to 400 watts. This can be said to be the starting point for solar panels used as chargers as there are some efficient models that have watts between 370 and 445. One important thing that you must note is that solar panels with higher watts produce more electricity, and this makes them ideal for maximizing energy production in various settings.

How many volts does a solar charger put out?

One of the key questions that you must have answers to before you use a solar charger to charge your phone is the volts that solar chargers put out. We gathered that when it comes to the voltage rating of solar chargers, most of them are engineered to have 12 volts. However, there are instances that you can have higher voltages and this is dependent on your specific requirements. In the event that you want a higher voltage than the normal 12 volts, there are ways you can configure solar panels in series to achieve the desired voltage level, and this flexibility ensures that your energy needs are met efficiently and effectively.

How to Build Your Own Solar-Powered Phone Charger

To successfully make your own solar-powered phone charge, you might consider going through the following steps;

  • Assemble the materials you need and such materials include solar panels, batteries, switches, and others.
  • You must see to it that whatever you intend should be based on size, capacity, and efficiency.
  • Go ahead and wire the solar panel to the charge controller, and then to the battery. It is recommended to ensure that there are proper connections and polarity.
  • After going through the above steps, the next step is to test what you have made. Just place the charger in sunlight, and monitor charging, while you check its efficiency.

Source: www.ghgossip.com

DIY: How to Make Facial Masks with Kitchen Ingredients – Making facial masks with kitchen ingredients will save you the hassle of leaving your home and visiting a spa.

The stress alone can discourage you from going for your skin routine. However, knowing how to make such products at home can sort you out big time and let you perform whatever you want to perform on your skin in the comfort of your home.

What are the benefits of using kitchen Ingredients to make facial masks?

There are some benefits that you can derive from making facial masks with kitchen ingredients. During our research for this article, we discovered that using kitchen ingredients for facial masks offers a natural, chemical-free skincare routine that’s gentle on any sensitive skin. Kitchen ingredients allow for customizable treatments tailored to specific skin concerns, and in effect, kitchen-based facial masks provide a transparent, safe, and eco-conscious alternative to commercial skincare products.

How do you make a face mask with kitchen ingredients?

In order to make a face mask with kitchen ingredients, you have to mix a couple of natural fruits and vegetables. At some point, you can add other ingredients like honey and olive oil.

What is the best 2-ingredients face mask recipe?

The best 2-ingredient face masks that we discovered through our research were made with lemon and honey. What we discovered was that combining lemon and honey creates a powerful face mask. Lemon is known to be made of some substances that brighten the skin and even out the tone. On the other hand, honey moisturizes and has antibacterial properties, and this leaves your skin refreshed and glowing.

What is the most effective homemade face mask?

There are several homemade face masks around, however, the most effective homemade face mask that we discovered in our research was hydrating masks. These magnificent masks are made by combining avocado, plain yogurt, olive oil, and honey. Mix these ingredients and apply the mixture generously to your face, spreading the mixture evenly. Leave the mask on for 15 to 20 minutes to allow the nourishing ingredients to penetrate your skin. After the stipulated time, go ahead and rinse the mask off thoroughly with lukewarm water.

How to Make Facial Masks with Kitchen Ingredients

Keep in mind that before you start mixing ingredients, you need to gather some essential tools and as well the ingredients that you will be mixing. Some of the tools you need to make facial masks are a mixing bowl, a spoon or whisk, measuring spoons, and a clean brush for application.

Additionally, it is also important to choose ingredients based on your skin type. For instance, honey is a great base for all skin types due to its antibacterial and moisturizing properties, while ingredients like lemon juice are best for oily skin due to their astringent qualities. Below are what you need to mix depending on the type of skin that you have;

For Oily Skin – If you happen to be someone who is known to have oily skin, it is recommended that you combine one tablespoon of honey with a few drops of fresh lemon juice. Lemon helps to tighten pores and reduce oiliness, while honey hydrates the skin.

Another recipe that you can do is mix two tablespoons of finely ground oatmeal with two tablespoons of plain yogurt. Our checks revealed that oatmeal is known to absorb excess oil, and yogurt contains lactic acid, which gently exfoliates the skin.

For Dry Skin – Anyone who has dry skin and is interested in making a facial mask with kitchen ingredients, he or she must mash half an avocado and mix it with one tablespoon of olive oil. It is widely known that avocado is rich in healthy fats and vitamins, and olive oil provides deep hydration. The above recipe is not the only recipe that such an individual can make. Another recipe that is available is banana and honey. To make this, just go ahead and mash a ripe banana and blend it with one tablespoon of honey.

For Sensitive Skin – Anyone with quite sensitive skin can blend half a cucumber and mix it with two tablespoons of aloe vera gel. Cucumber is known to have coolant properties as it cools and soothes the skin. On the other hand, aloe vera has anti-inflammatory properties.

Source: www.ghgossip.com

How to Upcycle Old CDs into Decorative Items – You might probably be thinking about throwing your old CDs away because you have no use for them. Well, before you proceed, we would like you to consider this – how about turning them into valuable creative pieces that can be used for decorations? You might think this will be a tedious process, however, it is not and we will take you through how you can do this in some simple steps.

How do you make use of old CDs creatively?

Due to the current technological advancement, CDs and DVDs have become old fashion. The only thing that they can be used for is creative decoration.

There are ways that you can repurpose old CDs and DVDs and these offer a range of creative possibilities.

From using old CDs and DVDs to make traditional Indian tea light holders, layered CD wreaths, and festive Christmas ornaments there is a wide range of popular projects that give new life to old CDs and DVDs.

Additionally, you can repurpose CDs as needle cases or storage containers and this provides practical solutions for organizing crafting supplies. With a touch of creativity, you can turn your old discs into functional and decorative items. This will not only cut down the number of waste products in your home but will also add personality to your home decor.

What can I do with old CDs?

By now, after mentioning creative ideas to transform your old CDs and DVDs, you are probably wondering what exactly you can do with your old CDs and DVDs. Well, this section of the article will expose you to some creative ideas that will have a positive lasting effect on you. In fact, there are plenty of creative options to explore. You can repurpose them into a mosaic mirror, cutting them up to add a touch of sparkle to various surfaces, you can transform old CDs and DVDs into jazzed-up jewelry pieces. For anyone looking to add some flair to their home, you can consider making a homemade disco ball from old discs. Hanging photo frames can also be made from old CDs and DVDs. Imagine hosting the love of your life in your home and using old CDs as elegant candle holders to create a romantic ambiance.

How to make flowers from old CDs?

One of the crafty ways that you can significantly transform old CDs is by turning them into flowers. In order to do this, you must first gather your materials. The materials needed include old CDs or DVDs. Once you have these CDs at hand, proceed by cutting petal shapes from the discs. The next step is to etch the petals. Go ahead and assemble the petals by gluing them together to form the flower’s bloom. To make the creative piece ready for use, add a stem to each flower, using materials like wire or floral tape.

Is there any reason to keep old CDs?

There are several reasons why people may tend to keep old CDs or DVDs. Factors like sentimental attachment, rarity of content, potential future use, and practical considerations (using it for decorations) may inform the decision of people to keep old CDs. You can now see some of the varied reasons why people may keep old CDs and the ultimate decision to keep old CDs depends on individual preferences and circumstances.

How to cut CDs for crafts?

You just don’t start cutting CDs for crafts because they must undergo some form of conditioning. This involves softening the CDs to make them easier to cut, and we found out in our research that a valuable method is to immerse them in boiling or very hot water for approximately ten minutes. The next step after the softening process is to carefully remove the CDs from the water using tongs or a heat-resistant tool to avoid burns. Proceed to use sturdy scissors or gardening clippers to cut the CDs into desired shapes. In doing this, kindly put all the necessary safety measures in place to avoid any injury.

How to Upcycle Old CDs into Decorative Items

If you are thinking of how to upcycle old CDs into decorative items, then carefully read this section of the article as it has all the juicy details you are looking for. Upcycling your old CDs into decorative items involves some steps and these steps are;

Gather Materials Needed for Upcycling CDs – The materials needed for making a decorative piece from old CDs are Old CDs, scissors or a craft knife, adhesive, paints, and markers.

Have Creative Ideas for Upcycling CDs – Once you have your materials, you must put your creative ideas into use. Some of the ideas you can use include turning old CDs into coasters and creating a mesmerizing mosaic, ornaments, photo frames, and clocks.

Source: www.ghgossip.com

DIY: How to Sew a Quilt from Old T-Shirts – T-shirt quilts are some of the creative ways to make your old T-shirts useful rather than throwing them away. In fact, they show how creative you can be when it comes to clothes.

You would think that you will need some form of specialized expertise to make T-shirt quilts, but that is not the case as you can do it yourself (DIY) at home. All you need is the list of required materials. This article has everything that you need to know when comes to making T-shirt quilts by yourself.

How many T-shirts to make a quilt?

As a T-shirt quilt creator or someone who wants to venture into the creation of T-shirt quilts, you must first know the number of T-shirts needed to make a T-shirt quilt. Doing this calculation and knowing the number of T-shirts needed involves striking a balance between achieving your desired aesthetic as well as maintaining practicality. Through our research, we gathered that in order to make T-shirt quilts, the recommended number of T-shirts is between fifteen (15) to forty (40). But hey, this is not a figure that is cast in stone as the exact quantity hinges on your vision and preferences.

How to stabilize a T-shirt for a quilt?

One of the things you will need to do when preparing a T-shirt for a quilt is stability. It is crucial to ensure that the fabric maintains its shape and integrity throughout the quilting process.

As a T-shirt creator, opting for a lightweight fusible stabilizer offers an effective solution. This stabilizer serves as a supportive foundation. This also prevents the jersey fabric from stretching excessively. If you diligently stick to this method, you can seamlessly integrate T-shirts into your quilt while preserving their value and.

What is the difference between a T-shirt quilt and a T-shirt blanket?

The main difference between a T-shirt quilt and a T-shirt blanket lies in the materials used. For T-shirt quilts, they are comprised of three layers. The layers are the cherished T-shirts themselves, a layer of batting for added warmth and structure, and a backing fabric of choice. In the case of T-shirt blankets, they consist of just two layers. These layers are the T-shirts, which serve as the centerpiece showcasing memories and milestones, and a plush fleece backing that offers both softness and durability.

Can you make a T-shirt quilt without interfacing?

During the making of T-shirt quilts, while many think it is necessary to do interfacing, it can be done without interfacing. So the answer to the question, Can you make a T-shirt quilt without interfacing? is an affirmative one. Our checks revealed that some advancements in modern sewing technology have rendered the use of interfacing optional. These new ideas have, in a way, liberated creators from the constraints of the tedious traditional methods. One thing we noticed is that these have also enabled these creators to explore new avenues of creativity.

How to Sew a Quilt from Old T-Shirts

This is probably the section of this article that you were waiting for as it has all the juicy gist that you wanted. It is safe to assume that I saved the best for the last. Well, below is how you can sew a quilt from old T-shirts;

  1. Gathering Materials and Supplies: The first thing that you will need to do is to have the right materials so you will need to start by gathering these materials. You’ll need a variety of old T-shirts, preferably made from cotton for easier sewing. Since there will be some form of cutting and sewing, you will need sewing tools such as scissors, a rotary cutter, a cutting mat, a sewing machine, thread, and quilting pins.
  2. Selecting and Preparing T-Shirts: After assembling the material, Choose the T-shirts you want to include in your quilt. It is recommended to wash these T-shirts (if dirty) and iron them so that they are free of wrinkles as this makes the cutting quite smooth.
  3. Designing Your Quilt Layout: Proceed to create a layout for your quilt by arranging the T-shirt panels in a visually pleasing pattern.
  4. Cutting and Arranging Fabric Panels: Once you’ve settled on a layout, use scissors or a rotary cutter to carefully cut the T-shirt panels to size. Be sure to leave a seam allowance around each panel for sewing.
  5. Sewing the Quilt Top Together: With the panels arranged in the desired order, begin sewing them together to create the quilt top, and this can be done with the use of a sewing machine.
  6. Adding Batting and Backing: Once the quilt top is complete, it’s time to add batting for warmth and backing for stability.
  7. Quilting Techniques: The whole process will be incomplete without adding a suitable quilting technique. Choose a quilting technique that complements your design. Some of the available techniques are straight-line quilting, free-motion quilting, or hand quilting.
  8. Finishing Touches and Embellishments: To make it quite suiting, you must add some finishing touches.

Source: www.ghgossip.com

Creative Ways to Upcycle Old Furniture – In order to reduce the amount of waste around us, there are some things that need upcycle or revamping rather than replacement. One such is furniture as upcycling will give them a new look and make you fall in love with them again just like how you fell in love with them when you first bought them.

This article contains several ways that you can actually upcycle your old furniture in the most creative ways so we would urge you to stick with us to the end of this article as we are about to blow your mind away with some creative ideas. It is safe to mention that upcycling old furniture offers a lot of creative possibilities.

How can I make my old furniture look cool?

One of the refreshing things that you can do to your old-fashioned furniture is revamping them to suit your new taste. In fact, there are stylish ways that you can transform your old furniture. First, what you need to do is assess the condition of the furniture, and if you feel they are quite weak, you can begin thinking about revamping them. This can involve tightening screws and fixing loose joints to make them as one unit.

Some of your furniture looks old because it needs a new look in terms of color so giving these old furniture a new look is actually a versatile way to breathe new life into it. This leads us to our next point which involves adding decorative elements like decals, stencils, or wallpaper to your old furniture to make them glamorous.

You would be amazed that by trying out any of these steps and infusing your creativity, you can turn your old furniture into cool as well as standout pieces that reflect your style and current taste when it comes to furniture.

How to repurpose wood furniture?

There are several ways that you can repurpose wood furniture that are quite old. You can actually convert these old wood furniture if they are found indoors into outdoor furniture. Just simply dismantle the top and use sturdy wooden planks to fashion a charming garden bench. You can use these to have perfect leisurely moments while outdoors. In fact, with a touch of creativity, these simple adjustments can turn forgotten old furniture into standout features, enhancing both your outdoor and indoor looks.

Can you make money upcycling old furniture?

If you are looking for ways to make extra money while having old furniture, then this section of the article was carefully curated for you. To be honest, upcycling old furniture can be a lucrative venture. Through our research, we found out that many people have made quite a significant amount of money by upcycling furniture and they did so by selling them. Whether actively seeking pieces or stumbling upon discarded treasures, if the wood that was used to make is solid, you are definitely good to go. This sustainable practice not only generates extra income but also contributes to reducing waste and promoting eco-friendly alternatives in home decor.

Creative Ways to Upcycle Old Furniture

There are some creative ways that you can upcycle your old wood furniture and some of these creative ways are;

Look for ways to repurpose old-fashioned furniture to better suit your needs. For instance, you can turn an old ladder into a stylish bookshelf. Another example is using a wooden pallet as a rustic coffee table. In fact, by thinking outside the box, you can maximize space and utility in your home while reducing the need to buy new furniture.

As mentioned earlier, painting is also one of the ways to upcycle your old furniture. Well, you can start by experimenting with different painting methods to create unique designs and patterns. You can also try considering incorporating natural elements like driftwood as well as seashells for a coastal-inspired look to add a touch of glamour to your old furniture.

You change your old furniture into eco-friendly innovations. By giving new life to your old furniture, you’re reducing the demand for new materials and minimizing waste. Upcycling also allows you to express your individual style and this also reduces the level of bad impact on the environment.

Source: www.ghgossip.com